Phpipam IP address management
Stuff to figure out and do
How do you move the high subnets to a different folder
Import devices
SNMP scan the devices - more detail (arping, mac addresses)
mark a range of the subnet as being DHCP assigned
get the detection script into cron
insert mac adresses into devices / subnets - find the mac address icon thingie; search for mac addresses
After clean install things to do
Change the login timeout (see below)
In Administration -> IP Related management -> Nameservers
Administration -> IP Related management -> Sections -> Create a new section
Administration -> IP Related management -> Filter IP fields
Device Management -> Locations -> Add locations
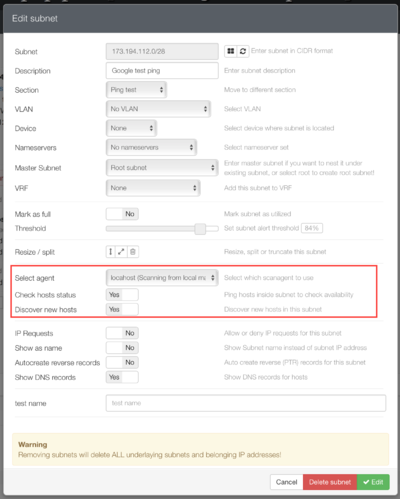
Administration -> IP Related management -> Subnets -> Add subnet (make sure that scan agent is localhost, hosts check, discover new hosts and resolve dns are On - also see below for discovery)
In the subnet, there is a tiny icon for Scan Subnet for New Hosts under Actions. Click that and wait for ping. Also favorite the subnet somewhere in that Action icon list.
Administration -> Devices -> add devices. Ensure the device is in the correct subnet. You can then edit the device with the cog icon and set the SNMP information for polling.
Subnet -> IP -> Edit -> you can now link the IP to the device
SNMP Mac Scanning
You need to be able to access the mibs, so first
apt-get install snmp-mibs downloader
Check if you can get the information you need:
snmpget -v2c -c community -mALL 192.168.0.3 sysName.0 sysObjectID.0
snmpwalk -v2c -c edgarro 192.168.0.3 system
from here first you need to enable SNMP support and configure devices.
   administration > settings > enable "SNMP module"
   go to administration > devices, on the right there is new "cogs" icon, click on it
   set SNMP details to connect to routers / switches via snmp
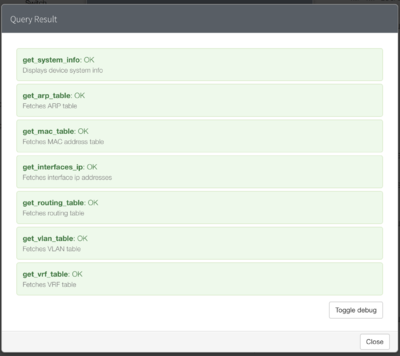
   for queries select at least "get_arp_table" and "get_mac_table"
   click test to see that queries are performed ok
After this is ok go to subnet you wish to scan, for "Select Scan type" select appropriate scan. It will go through all devices you enabled arp/mac scan for and try to detect mac addresses.
SNMP support for multiple vendors - TARGET after phpIPAM V1.40 release
You can help out by sending the correct MIBs to the phpipam support list.
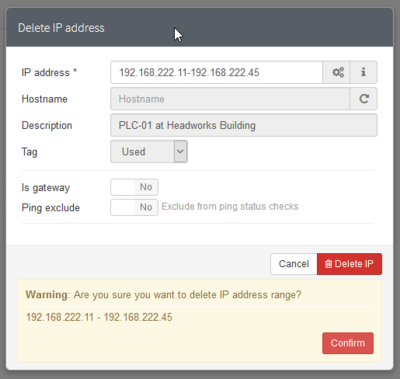
Bulk deletion op IPs in subnet
Bulk IP Deleting is sort of a hidden function. Just enter the range you would like to delete when you are deleting a single IP address
To change the login timeout (which is set to short!)
in php.ini
session.use_cookies = 1
session.cookie_lifetime = 86400
session.gc_probability = 1
session.gc_divisor     = 1000
session.gc_maxlifetime = 86400
Also set inactivity timeout in phpipam administration to less or equal to what is in session.gc_maxlifetime.
To set automatic host discovery and availability check
from here Firstly, pcntl support for php cli is advised so phpipam can do parallel icmp checks, this greatly reduces time required for checking status. You can check if your installation is ok with following command:
php -m | grep pcntl
1.) Configure the parameters for pinging
Set the time parameters for status under Administration > IPAM settings (Ping status intervals), phpipam will set host as down/up based on this values. Also, set the proper icmp parameters and paths.
2.) Select which networks to check
subnet scan selection Now you have to select which subnets should scan for statuses for configured hosts.
Go to edit subnet and check “Check hosts status”. This will tell the cron script to check the status of hosts inside this subnet. “Discover new hosts” will try to find new hosts for this subnet and will automatically add them to phpipam database.
3.) Add cron script
I suggest checking it per 15 minutes:
# update host statuses exery 15 minutes
*/15 * * * * /usr/local/bin/php /usr/local/www/phpipam/functions/scripts/pingCheck.php
*/15 * * * * /usr/local/bin/php /usr/local/www/phpipam/functions/scripts/discoveryCheck.php
Change the paths according to your installation of course 🙂
That should be it. I would advise to run the script manually for the first time to see if any errors are present.


